Welcome to your comprehensive Windows 11 Installation Guide Step by Step! Whether you’re upgrading to enjoy the latest features or setting up a new PC, this guide will smoothly walk you through each step. Windows 11 is designed to enhance productivity, creativity, and ease of use, offering a sleek interface and improved performance. Let’s dive into how you can get Windows 11 up and running on your machine with this detailed step-by-step installation guide.
Prerequisites for Installing Windows 11
Before you begin the exciting journey of installing Windows 11,it’s important to ensure that your PC meets the necessary requirements. Windows 11 has specific system needs that include a compatible 64-bit processor, 4GB RAM, 64GB storage, DirectX 12 well suited images, and a show that’s 9 inches or larger with HD resolution. You can quickly test in case your device is eligible for an upgrade the use of the PC Health Check app provided through Microsoft.
Backing Up Your Data: It’s essential to back up your data before you start. Whether you have files, photographs, or applications, securing your records guarantees that you will lose critical documents at some point of the improvement. Use an outside power or cloud storage to keep your files. This step is crucial for a clean and worry-unfastened installation.
Preparing for Installation Windows 11
Downloading the Installation Media
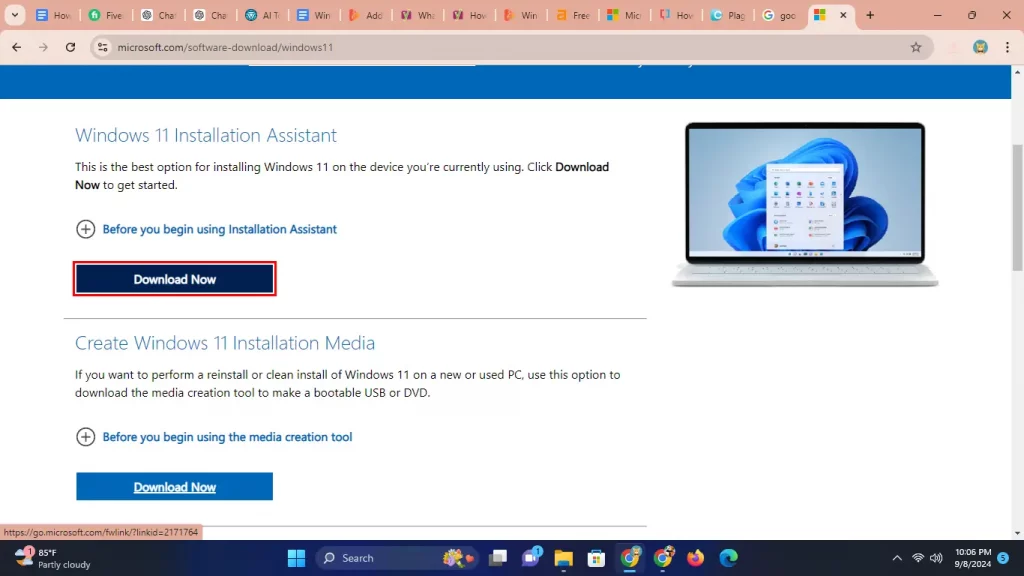
First, go to the Microsoft website to get the setup file. Look for the Windows 11 download page and click “Download Now” where it says “Create Windows 11 Installation Media.” Then, follow the steps to download the Media Creation Tool, which you’ll use to make a USB drive that can start Windows 11.
Creating A Bootable USB Drive
After you download it, open the Media Creation Tool. Pick “Create installation media for another PC.” Choose the right language, edition, and system type for Windows 11. Ensure you have a USB drive with a minimum capacity of 8GB. The tool will clear the USB, so check it has no important files.
Make sure you have a real Windows 10 licensee. If you do, you can get Windows 11 for free if you have Windows 10. You’ll need this licensee to turn on Windows 11 after you put it on your computer.
Step-by-Step Installation Process
Step 1: Boot from the USB Drive
Turn off your computer and turn it back on. When it starts up, press a key like F2, F12, DEL, or Esc to go to the BIOS settings. The key may vary depending on the computer. In the BIOS, look for the boot menu and choose the USB drive as the main device to start from. This setup lets your computer begin installing from the USB drive.
Step 2: Begin the Installation Process
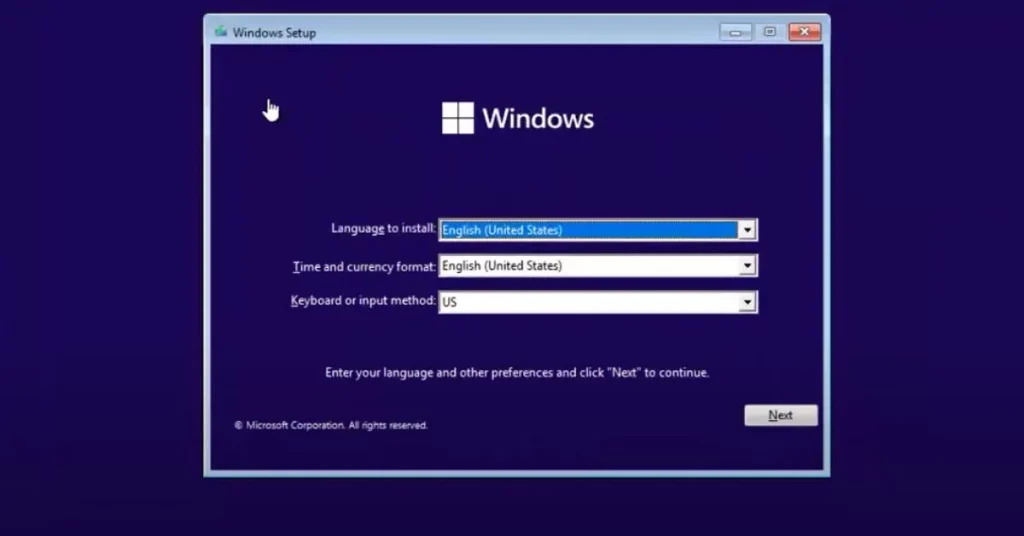
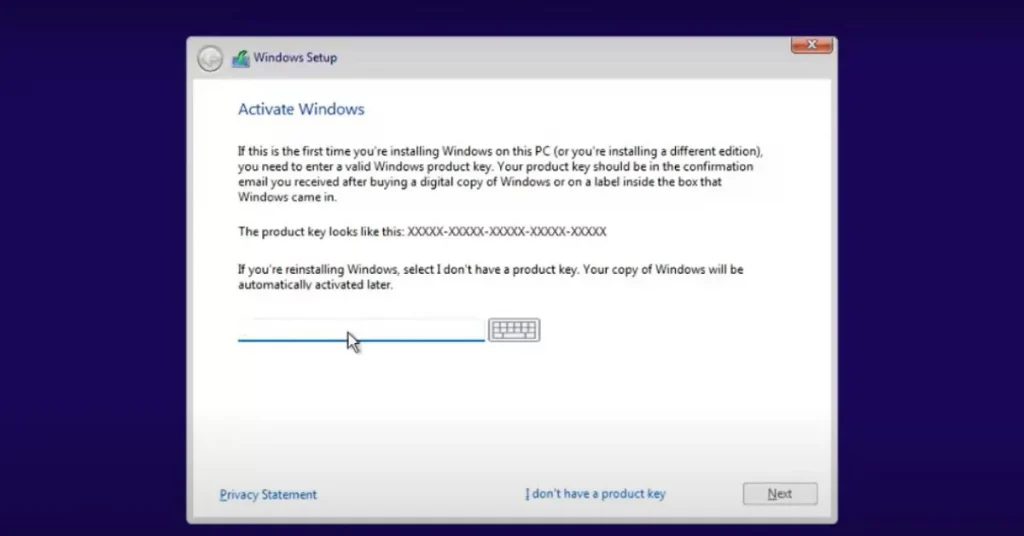
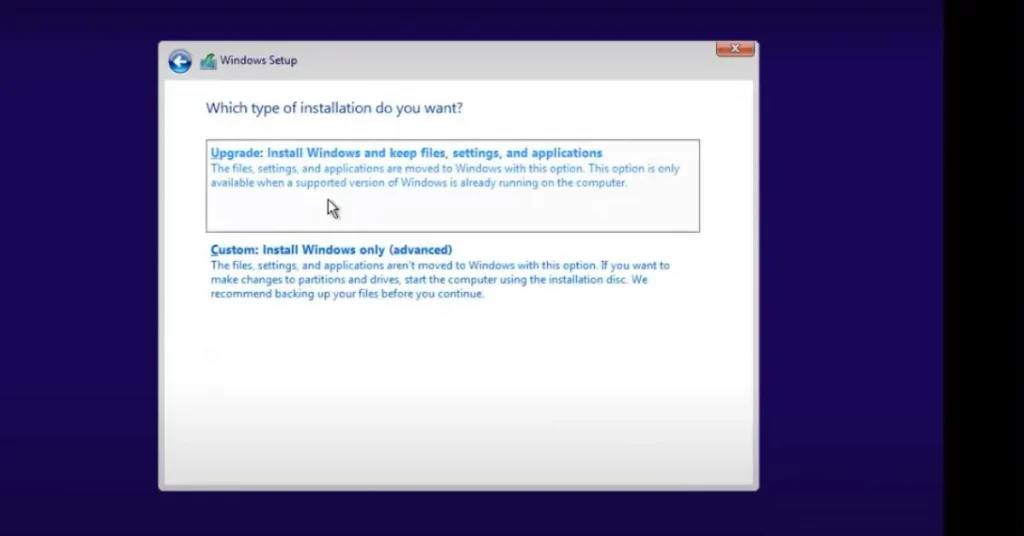
When you start your computer from the USB, the Windows 11 setup will help you. On the first screen, click “Install Windows.” You can enter your Windows 10 licence key next, or you can skip this step if you are putting Windows 11 back on. Next, pick the type of setup you want: Upgrade (to save your files and settings) or Custom (for a new setup without old files).
Step 3: Format the Hard Drive (Optional)
If you pick a custom installation, you might think about formatting your hard drive. You don’t have to do this, but it’s a good idea if you want a completely fresh start without old files or programs. Formatting will delete all the data on the drive, so make sure you have backed up everything important first.
Step 4: Follow the On-Screen Instructions
The installer will ask you to choose your preferred language, time, and keyboard settings. After making these choices, follow the instructions on the screen to pick the type of installation and the partition where Windows 11 will be installed. The system will then start copying files, installing features, and setting things up.
Step 5: Complete the Installation
The installation process will take a while, usually between 30 minutes and an hour. Expect your computer to restart several times throughout this process. Make sure you do not turn off your computer while this is happening. After the installation finishes, you will go through some setup screens to choose your preferences and settings.
Conclusion
This Windows 11 Installation Guide Step by Step helps you install the new system easily. Make sure you follow each step carefully. Remember, your computer will restart many times, and you need a USB drive with at least 8GB. Once you finish, you can enjoy all the new things Windows 11 offers.
